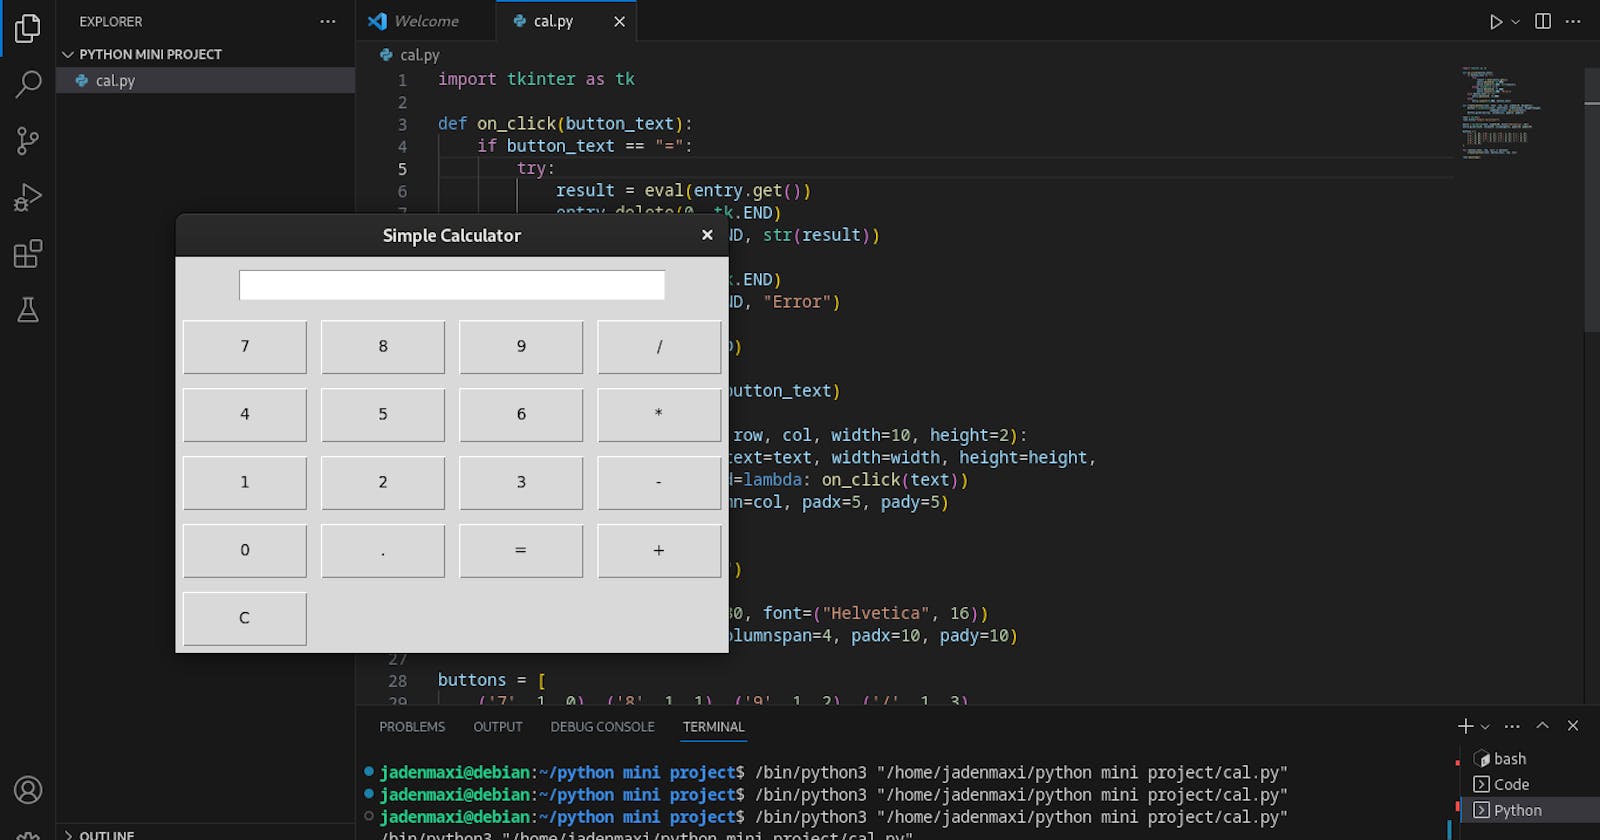
In this tutorial, we'll create a graphical user interface (GUI) calculator using Python and the Tkinter library. Tkinter is a built-in Python library for creating GUI applications and provides a wide range of widgets and tools to develop interactive desktop applications. By the end of this tutorial, you'll have a fully functional calculator that performs basic arithmetic calculations with ease.
Sure! Below is the description of the GUI calculator using Tkinter written as a Hashnode article:
Building a GUI Calculator with Python and Tkinter
In this tutorial, we'll create a graphical user interface (GUI) calculator using Python and the Tkinter library. Tkinter is a built-in Python library for creating GUI applications and provides a wide range of widgets and tools to develop interactive desktop applications. By the end of this tutorial, you'll have a fully functional calculator that performs basic arithmetic calculations with ease.
Prerequisites
To follow along with this tutorial, you'll need:
Python 3 installed on your system.
Basic knowledge of Python programming.
Getting Started
Let's start by creating a new Python script to build our GUI calculator. Open your favorite text editor or integrated development environment (IDE) and create a new file called gui_calculator.py.
First, we need to import the tkinter module and define a function to handle button clicks. The button click function will be called when any button in the calculator is pressed.
import tkinter as tk

def on_click(button_text):
    # Button click handling logic will be added later
    pass
Now, let's create the main application window using Tkinter's Tk class:
root = tk.Tk()
root.title("GUI Calculator")
root.geometry("300x400")
In the code above, we create the main window with a title "GUI Calculator" and set its initial size to 300 pixels wide and 400 pixels high.
Next, we'll create an entry widget to display the input expression and the result:
entry = tk.Entry(root, width=20, font=("Helvetica", 20), bd=5)
entry.grid(row=0, column=0, columnspan=4, padx=10, pady=10)
The entry widget is a single-line input field where the user can enter the arithmetic expression and see the result. We set its width to 20 characters, use the "Helvetica" font with a size of 20, and add a border of 5 pixels around it. We then use the grid geometry manager to position the entry widget at the top (row 0, column 0) and make it span four columns.
Now, let's define the buttons for our calculator:
buttons = [
    ('7', 1, 0), ('8', 1, 1), ('9', 1, 2), ('/', 1, 3),
    ('4', 2, 0), ('5', 2, 1), ('6', 2, 2), ('*', 2, 3),
    ('1', 3, 0), ('2', 3, 1), ('3', 3, 2), ('-', 3, 3),
    ('0', 4, 0), ('.', 4, 1), ('=', 4, 2), ('+', 4, 3),
    ('C', 5, 0),
]
In the buttons list, each item represents the button's text and its grid position (row and column) inside the calculator.
Now, let's create the buttons and add them to the main window:
for (button_text, row, col) in buttons:
    button = tk.Button(root, text=button_text, width=5, height=2, font=("Helvetica", 14),
                       command=lambda text=button_text: on_click(text))
    button.grid(row=row, column=col, padx=5, pady=5)
In the above code, we use a loop to iterate through each item in the buttons list. For each item, we create a Button widget with the specified text, width, height, and font. We also assign the on_click function as the command to be executed when the button is clicked. Finally, we position the button at the specified row and column using the grid geometry manager.
Now that we have created the main components of our GUI calculator, let's move on to implementing the button click handling logic.
def on_click(button_text):
    if button_text == "=":
        try:
            result = eval(entry.get())
            entry.delete(0, tk.END)
            entry.insert(tk.END, str(result))
        except Exception as e:
            entry.delete(0, tk.END)
            entry.insert(tk.END, "Error")
    elif button_text == "C":
        entry.delete(0, tk.END)
    else:
        entry.insert(tk.END, button_text)
In the on_click function, we'll handle button clicks and perform the arithmetic calculations. When the "=" button is pressed, we'll use Python's eval function to evaluate the expression entered in the entry widget and display the result. If there's an error during evaluation, we'll show "Error" in the entry field. When the "C" button is pressed, we'll clear the entry field.
root.mainloop()
This is the main event loop that listens for events (such as button clicks) and handles them. It keeps the application running until the user closes the window.
python gui_calculator.py
And that's it! We have now completed the implementation of our GUI calculator. Save the gui_calculator.py file and run it using the Python interpreter.
The GUI calculator window will appear, and you can start performing basic arithmetic calculations using the mouse. Enter the expression using the numeric buttons and the operation buttons (+, -, *, /), and click "=" to see the result.
Feel free to customize the calculator further, add more features, or style it according to your preferences. You can also explore Tkinter's other widgets and capabilities to create more complex GUI applications.
I hope you found this tutorial helpful and enjoyed building the GUI calculator with Python and Tkinter. Happy coding!
